If you’ve ever wandered through a craft fair and paused at the table of someone selling wall art, keychains, or even custom wreaths dotted with soft, fluffy pom-poms, you’ve probably wondered how those cute little spheres come to life. As a wool yarn supplier, I get this question all the time—everyone from hobbyists decorating nursery mobiles to small business owners stocking their handmade goods shelves wants to master this simple, satisfying craft. What many people don’t realize is that making wool pom-poms isn’t just a matter of wrapping yarn around something and cutting; it’s a process that balances tension, material, and a few small tricks to get that perfect, cloud-like fluff. Over the years, I’ve tested dozens of methods with the skeins in our warehouse, adjusted for different yarn weights, and even walked new hobbyists through their first projects over emails. Today, I’m sharing that knowledge with you, step by step, no fancy tools required—just some wool yarn, a few common household items, and a little patience. Wool Yarn
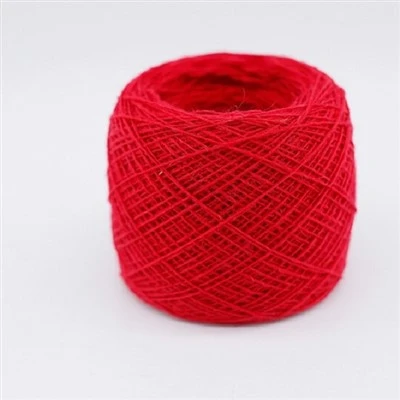
First, let’s talk about why wool is such a great choice for pom-poms, especially if you’re sourcing yours from a reliable supplier. Not all yarn is created equal, and the difference shows in the final pom-pom. Worsted-weight wool yarn, like the merino blend we carry, has a tight, durable fiber that holds its shape without turning into a messy wad after a few uses. Bulky wool works too, if you want extra-large, fluffy pom-poms for wreaths or floor pillows, but avoid super-fine fingering weight wool if you’re a beginner—it requires more precision to get a full, even ball. You’ll also want to steer clear of yarn with too much synthetic content if you’re after that classic woolly feel; synthetic fibers can make pom-poms feel stiff and less bouncy. For this tutorial, I recommend a worsted or bulky weight wool skein—enough for 3 to 5 medium pom-poms, so you can practice and adjust as you go.
Before we dive into the steps, gather your tools. You don’t need a fancy pom-pom maker (though we do sell them as an add-on in our shop, and they make the process even easier). For most people, two things will do: a pair of scissors, and two flat objects to wrap yarn around—like cardboard cutouts, old credit cards, or even two thick books. Cardboard is the most flexible because you can adjust its size to make different pom-pom diameters. If you want tiny pom-poms for jewelry, cut two 1-inch wide cardboard rectangles; for medium pom-poms for hats or garlands, go for 2-inch wide; for large, statement-making ones, cut 3-inch wide. The length of the cardboard strips should be about twice the diameter you want—so a 2-inch pom-pom needs strips 4 inches long, for example.
Now, let’s get to the core steps, starting with wrapping the wool around your two cardboard pieces. Hold the two cardboard strips together, flat side to flat side, so they act like a single, narrow frame. Take the end of your wool skein—leave a 6-inch tail loose at the start, don’t cut it yet—and begin wrapping the yarn tightly around the gap between the two cardboard strips. Tension is key here; if you wrap too loosely, your pom-pom will come out lopsided and sparse. If you wrap too tight, you’ll struggle to cut through the loops later. Start with 50 to 70 wraps for a medium pom-pom; bulky wool will need 30 to 40 wraps, while finer worsted will need 70 to 90. The more wraps you add, the fuller your pom-pom will be, so don’t be shy—add an extra 10 wraps if you want that extra fluff. Once you’re done wrapping, hold the wrapped loops firmly against the cardboard so they don’t slip, and cut the yarn from the skein, leaving another 6-inch tail at the end.
Next, you need to secure the wrapped loops so they stay together when you remove them from the cardboard. Take one of your loose tails (it doesn’t matter which one) and slide it between the two cardboard strips, right into the gap where all the loops are. Pull the tail through until there’s a 2-inch section left sticking out the back of the cardboard. Now, tie the tail in a tight double knot around all the wrapped loops. Don’t pull too hard that you split the wool fibers, but tight enough that the loops won’t come undone when you cut them. Once that first knot is secure, use the other tail to tie a second double knot on the opposite side of the loops, right next to the first knot. This double-secure method is one of the tips I share with new customers—single knots often come loose when you start cutting, especially with thick wool, so taking those extra 30 seconds saves you from a mess later.
Now comes the part that feels the most satisfying: cutting the loops and releasing the pom-pom from the cardboard. Take a pair of sharp scissors (dull scissors will fray the wool fibers and make your pom-pom look fuzzy in a bad way) and slide the blades into the gap between the two cardboard strips, right next to the knot you tied at the end of the wool. Cut through all the loops of wool that are facing you. Repeat this on the opposite side, sliding the scissors into the gap on that side and cutting through all the remaining loops. Once both sides are cut, gently lift the cardboard strips off the center of the wool. If your knots were tight, the loops will stay clustered together, and you’ll see a lumpy, round ball of wool in your hands.
Now it’s time to shape your pom-pom into that perfect, even sphere. This step is where a lot of beginners skip ahead, and their pom-poms end up lopsided. Take your scissors again and trim any long, stray fibers that stick out unevenly all around the ball. Work slowly, holding the pom-pom up to the light to spot thick patches and thin patches. If one side is noticeably fuller, trim a little more from the opposite side to balance it out. You can also trim small sections around the center of the pom-pom if it’s too dense—this will make it fluffier and lighter. This shaping process takes 2 to 3 minutes for a medium pom-pom, but it’s worth it to get that soft, round look you see in craft projects.
Wait a second—what if I want a bigger pom-pom, or a softer one, or a pom-pom that’s not perfectly round? Over the years, I’ve helped customers test different adjustments to the basic method, and I’ve got a few pro tips that take your pom-poms from good to great. For extra-large pom-poms, skip the cardboard strips and use a pom-pom maker frame (we carry these in multiple sizes, perfect for wreath projects). Pom-pom makers have two hinged plastic halves that open easily, so you can wrap more yarn in less time, and they’re ideal for 4-inch and larger pom-poms. For extra-soft pom-poms, use a blend wool yarn or a fluffy merino wool skein—these fibers are softer than standard wool, and when trimmed, they create that cloud-like feel people love. If you want multi-colored pom-poms, wrap two or three different colors of wool at the same time, alternating strands as you wrap, instead of using a single color. This creates a marbled effect that’s great for garlands and kids’ craft projects.
I’ve also learned a lot about common mistakes that beginners make, so let’s go over those to save you time. The first is not leaving enough tail when you start wrapping—if you cut the yarn too short, you won’t have enough to tie the knots, and your pom-pom will fall apart. Always leave 6-inch tails, even if it feels like too much. The second is using dull scissors—thick wool fibers will fray instead of cutting cleanly, leaving your pom-pom with a messy, frizzy edge. Invest in a good pair of fabric scissors for crafting, or use your kitchen shears as long as they’re sharp. The third is rushing the trimming step—taking time to shape the pom-pom ensures it looks neat, so don’t skip it to move on to your next project.
As a wool yarn supplier, I’ve seen how these simple pom-poms turn into meaningful projects: a grandmother making a pom-pom garland for her grandkid’s bedroom, a small business owner selling hand-pom-pomed keychains at local markets, a hobbyist testing new pom-pom designs for her weekly craft posts. The best part about making pom-poms is that they’re versatile—you can add them to hats, scarves, wreaths, wall art, gift toppers, or even use them as part of a sensory toy for kids. They’re also a great beginner craft, no prior experience needed, and they use up small leftover skeins of wool that you might otherwise throw away.
If you’re ready to pick up the supplies for your first pom-pom project, we have a wide range of wool yarn skeins in every weight, color, and texture to match whatever you have in mind. Whether you want soft pastels for a nursery project, bold primary colors for a garland, or neutral tones for a minimalist wreath, we have options that work. Our team can also help you pick the right yarn weight and quantity for your project, answer any questions you have about the process, or even share additional tutorials for more advanced wool projects, like knitting small hats or making yarn-wrapped wall art.
If you’re planning a larger project—like making a set of pom-poms for a wedding decor line, stocking craft supplies for a retail shop, or creating a bulk order for a custom project—we can work with you to get the right quantities at wholesale pricing, with flexible delivery to fit your timeline. Every skein of wool yarn we carry is ethically sourced, soft, and durable, perfect for holding up through all the wrapping, cutting, and shaping of pom-pom making.
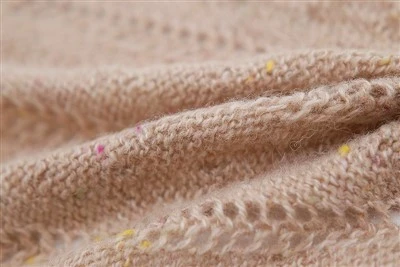
Making pom-poms is one of those small, satisfying crafts that feels like a mini celebration when you finish. It doesn’t require expensive tools or a lot of space, just some good wool yarn and a little patience. Whether you’re a total beginner or a seasoned crafter looking to refresh your skills, following these steps will help you create soft, even, beautiful pom-poms every time. When you’re ready to get started, or if you have questions about which wool yarn works best for your pom-pom projects, feel free to reach out to our team to learn more and discuss your needs. We’re here to help you get the right supplies for your craft, and to make sure your pom-pom projects turn out exactly how you imagine.
Fancy Yarn References
- The Art of Handmade Wool Pom-Poms, Craft Yarn Council.
- Beginner’s Guide to Pom-Pom Making, Wool Industry Association.
- Sustainable Crafting with Wool, Textile Society of North America.
Huangshan Aotai Textile Co., Ltd.
As one of the most professional wool yarn manufacturers and suppliers in China, we’re featured by quality products and good service. Please rest assured to wholesale bulk premium wool yarn in stock here and get quotation from our factory. We also accept customized orders.
Address: Development Zone, Bei’an Town, She County, Huangshan City, Anhui Province
E-mail: aotaifangzhi2007@163.com
WebSite: https://www.cn-aotai.com/
