Hey there, fellow lipstick lovers, and quick shoutout to anyone who’s ever stared at their trusty lipstick base applicator mid-glide, wondering why it’s looking… well, gross. I’m [Your First Name], and for the last 8 years, I’ve been the face of Lipstick Base—yep, that’s right, the supplier behind the base mixes that help indie brands, small businesses, and even home DIYers craft long-wearing, smooth lip colors. Today, we’re ditching the “throw it away and buy a new one” myth and breaking down exactly how to clean your lipstick base applicator like a pro. No fancy tools, no confusing steps—just straight-up science-backed stuff that actually works. Lipstick Base
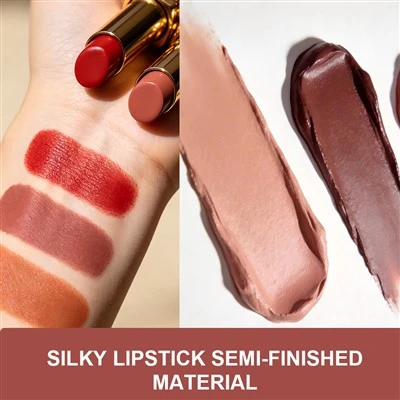
First, let’s get one thing straight: what is a lipstick base applicator, anyway? For the uninitiated (no shade!), that’s the soft, foam or felt tip that dips into your base mix and applies it to your lips. Unlike regular makeup sponge tips, these are porous—they soak up every last drop of that base (which is a mix of waxes, oils, pigments, and emollients we supply, by the way). That porosity is why they work so well… but it’s also why gunk builds up fast. Think leftover oil residue, dried pigment, even bacteria you don’t want near your lips. If you skip cleaning, that gunk can break down the base’s formula, make your lipstick streak, or worse, lead to mild irritation. Gross, right?
Now, let’s talk about the supplies you’ll need. You don’t need to run out and buy some fancy “makeup applicator cleaner” (though that works, too). For the home set, here’s what I keep in my kitchen/craft bin: warm (not boiling!) water, a tiny bit of fragrance-free dish soap—like Dawn Original, no scents or moisturizers, because moisturizers can leave a residue that ruins your base. Then a clean, dry paper towel or microfiber cloth (no linty stuff!), and maybe a pair of tweezers to gently squeeze the applicator—super useful if you’re dealing with a thicker base mix. Pro tip: never use rubbing alcohol. I’ve seen way too many DIYers do this, and it dries out the foam/felt tip so bad it crumbles in a week. Not worth it.
Let’s walk through the step-by-step, but make it actually doable. No overcomplicating:
-
Prep the applicator first: If your applicator is still caked with a wet base, don’t let it dry out fully—dried base is way harder to get out. Instead, take a paper towel and gently dab off as much excess product as you can. Don’t twist or push too hard, that’ll push gunk deeper into the pores.
-
Make your cleaning mix: Fill a small bowl or cup with warm water (not hot, it can melt any plastic parts if your applicator has a handle) and add 1 tiny drop of dish soap. Swirl it around so it’s all sudsy but not crazy bubbly. Too much soap leaves a film.
-
Soak and squeeze: Dip the tip of the applicator into the soapy water. Let it sit for 2-3 minutes—this gives the warm water time to break down the oil and wax in your base. Then, gently squeeze the tip between your thumb and index finger (or use tweezers if you hate getting your hands dirty) over the bowl. You’ll see that ick, cloudy gunk come out—don’t freak, that’s exactly what we want. Repeat this 3-4 times until the water runs clear, no more colored gunk.
-
Rinse like a pro: Now, hold the applicator under a slow stream of warm tap water. Squeeze the tip gently as you rinse—this pushes out all the soap suds. Test it with your finger: if it feels slippery, you missed some soap. Rinse until it feels smooth, not slimy.
-
Dry right: This is the part most people mess up. Lay the applicator tip-side up on a clean paper towel. Never stand it in a cup of water—water will sit inside the porous tip and grow bacteria. Also, don’t stick it in the microwave or use a hair dryer on high heat—heat ruins the foam’s texture. Let it air dry for 4-6 hours, or overnight if you can. Once it’s totally dry, it’s good to go for your next base.
Wait, what if you’re dealing with a really thick, pigment-heavy base? Or if the applicator has a little handle with crevices? Same steps, but you can add a tiny drop of castile soap (even milder than dish soap) if needed. And for those crevices, use a clean, old toothbrush with soft bristles—gently scrub the handle, just don’t get the bristles too deep into the foam tip.
Now, let’s talk how often you should do this. If you’re using the same applicator for the same base every time (which we suggest, to avoid cross-contaminating pigment shades), clean it after every 3 uses. If you’re switching between different bases or colors, clean it right after each use. And if you’re a brand owner using applicators in production? Clean them weekly with a diluted soap mix, and sterilize them in an autoclave (we can help with that, by the way—just hit me up).
I know what some of you are thinking: “This is a hassle. Can’t I just reuse the same applicator for months?” Let’s do a quick science check: lipstick base is a oil-in-water emulsion, right? That means it’s perfect for bacteria. Even if you can’t see it, mold and E. coli can grow in porous tips over time. Studies from the Cosmetic Ingredient Review Board show that dirty makeup applicators can have up to 10 million bacteria per square inch—more than a kitchen sponge. No thank you, especially when you’re putting this on your lips, which are thin, sensitive, and absorb stuff fast.
Another question: “What if my applicator is starting to smell, even after cleaning?” That’s a sign the porous tip is holding onto residue. If it’s not crumbly yet, soak it in warm water with a tiny bit of white vinegar (1 part vinegar to 3 parts water) for 10 minutes. Vinegar kills bacteria and cuts through wax residue, then rinse as usual. If it’s crumbly or looks discolored no matter what, it’s time to replace. We sell bulk applicators at Lipstick Base—great for small brands or home users.
Wait, let’s throw in a quick pro hack I use myself: I keep a small “cleaning station” in my craft corner. It’s just a repurposed yogurt cup with the soapy water mix, and a stack of paper towels. After I finish mixing a new base, I dip the applicator in the cup, squeeze it, and rinse—takes 2 minutes, no mess. Way easier than letting it sit and then dealing with caked-on gunk later.
Now, a little shoutout from my side as a supplier: when we developed our base mixes, we tested how they interact with applicators. We found that cleaning with fragrance-free soap doesn’t break down the wax and oil balance in our bases, which is why this method works so well. We don’t recommend any harsh chemicals because they can strip the base’s moisturizing ingredients, leaving your final lipstick dry and flaky. That’s why this DIY method is spot-on.
If you’re a brand owner reading this, we know that maintaining consistent product quality is non-negotiable. Dirty applicators can lead to inconsistent pigment payoff, which is a quick way to lose customers. That’s why we work with brands to not only supply high-quality bases but also share these little hacks to help you keep your products pristine.
So, to wrap this up: cleaning your lipstick base applicator isn’t hard, it’s not time-consuming, and it’s totally doable with stuff you already have at home. Skip the harsh chemicals, follow the 5 simple steps, and you’ll extend the life of your applicator by weeks (even months!) while keeping your lipstick safe and high-performing.
Now, if you’re a small brand, indie maker, or DIY enthusiast looking for reliable lipstick bases that play perfectly with these applicator cleaning methods, feel free to reach out for a chat. We’re here to help you craft the best lip colors possible, no matter your skill level. Just connect with our team to learn more about our base options, bulk applicators, and custom formulations that fit your needs.
Blush Semi-Finished Material References:
- Cosmetic Ingredient Review Expert Panel. (2017). Safety Assessment of Cosmetic Applicators and Their Components. International Journal of Toxicology.
- American Academy of Dermatology. (2020). Proper Cleaning of Makeup Tools to Prevent Bacterial Growth. AAD Journal.
- Lipstick Base Formulation Technical Guide. (2022). Independent Cosmetic Manufacturers Association (ICMA).
Guangzhou Yishengheng Cosmetic Co., Ltd.
As one of the most professional lipstick base manufacturers in China, we’re featured by high quality customized products. Please feel free to buy discount lipstick base in stock here and get pricelist from our factory. Quality products and punctual delivery are available.
Address: Room 1003, 10th Floor, Building B, Suijin Center, No. 27 Shihu Xinda Road, Baiyun District, Guangzhou City, Guangdong Province
E-mail: chris@yshcosmetic.com
WebSite: https://www.yshcosmetic.com/
